04 October 24
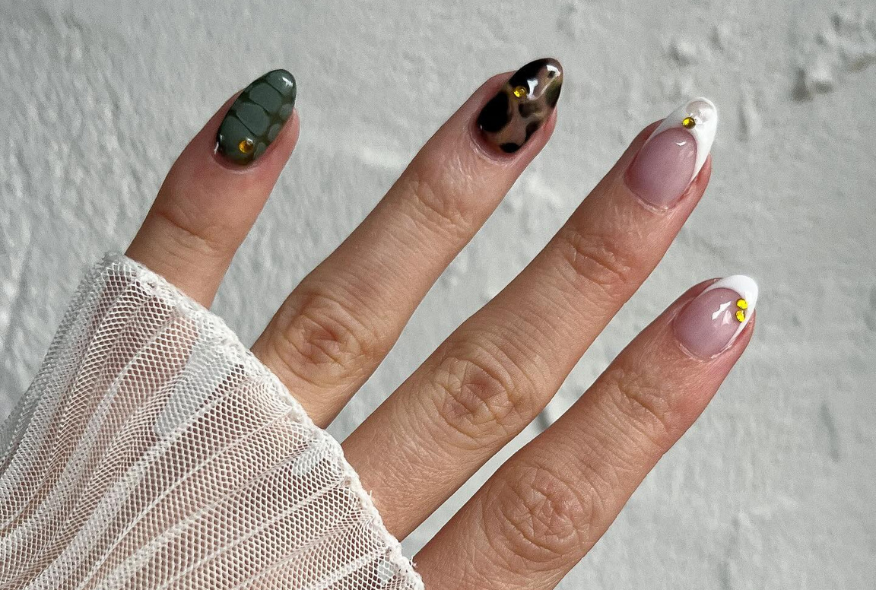
If you’re looking to create nail art more frequently or want to elevate your skills to the next level, it’s essential to use the right tools. With the appropriate nail art brushes, you can achieve precisely the creations you envision. In this blog, we provide an overview of our 10 nail art brushes and tools, to help you choose the perfect one for your desired look. Quality and maintenance are key, as well-maintained brushes last longer and deliver better results. Not only will we show you which brushes we offer and what they can be used for, but we’ll also give you inspiration for looks that you can create with each brush.
Curious about how to clean your nail art brushes? Check out our detailed guide on brush maintenance.
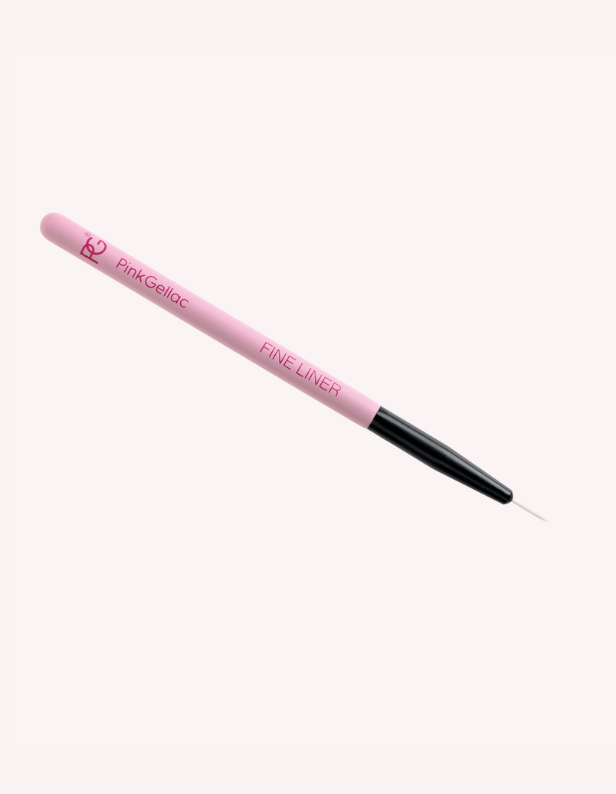
1. Fine Liner
The Fine Liner brush is ideal for precision work in nail art. With only a few bristles, this ultra-thin brush is perfect for creating miniature designs, geometric shapes, fine swirls, and floral patterns like Daisy Nail Art. It’s also great for adding animal prints and achieving a classic French Manicure, especially on shorter nails. Although it’s thin, you can create wider lines by layering strokes. Additionally, the Fine Liner can help you apply gel polish or Rubber Base closer to the cuticle and sidewalls for a more precise finish.
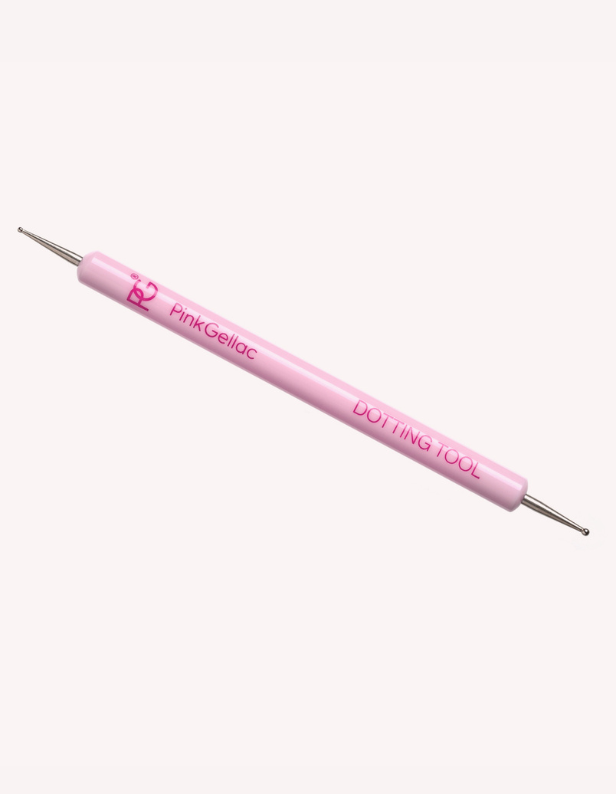
2. Dotting Tool
The Dotting Tool is a versatile accessory featuring a metal ball at each end in different sizes, offering extra options for your nail art designs. The larger the ball, the bigger the design. You can create dots, leopard prints, hearts, or mini flowers. When combined with Blooming Gel, the possibilities expand further, enabling effects like aura nails, crocodile print, and other floral patterns. Perfect for beginners and easy to clean - simply wipe with a bit of cleaner and a nail wipe.
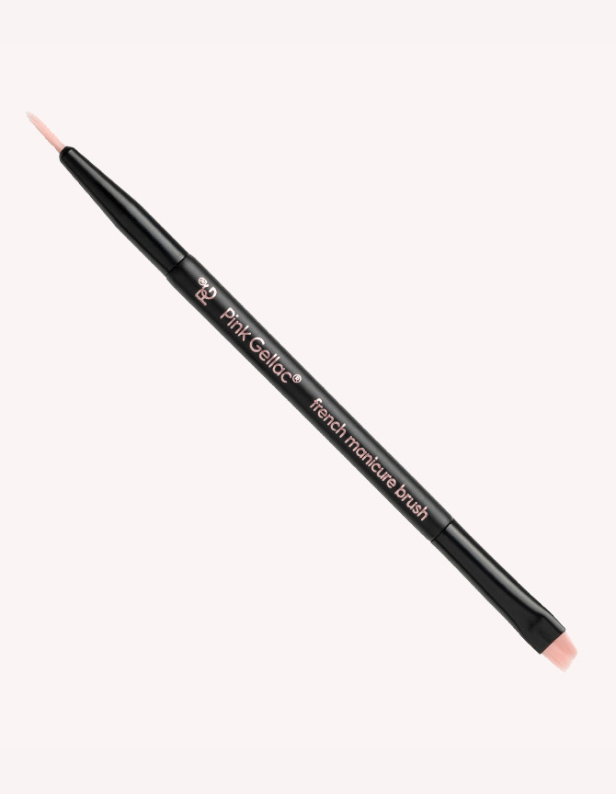
3. French Manicure Brush
This dual-sided tool has an angled brush on one end and a liner brush on the other, making it perfect for creating a classic French Manicure. Use the liner brush to apply the white tip along the nail edge, and the flat, angled side to smooth and perfect the design. Besides French Manicures, the angled brush is suitable for one-stroke designs, like floral patterns, or for cleaning up excess gel polish around your cuticles. Remember to store this brush flat to prevent the bristles from splaying.

4. Detail Brush
Also known as a liner brush, the Detail Brush is excellent for creating lines and intricate designs. The slightly angled handle at the top provides better control and ease of use. You can create geometric patterns, plaid designs, and elegant swirls, or even a reversed French Manicure.
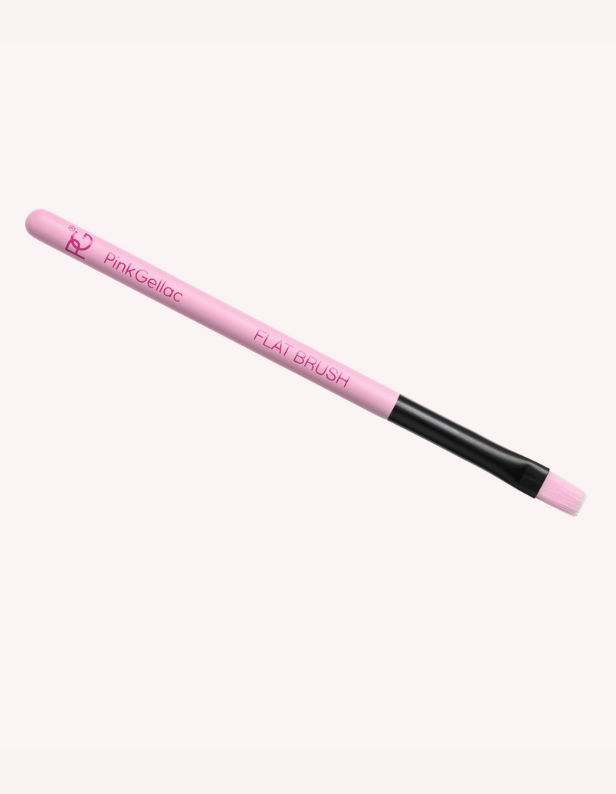
5. Flat Brush
Use the flat brush for marble designs in combination with Blooming Gel. Apply 2-4 colours on a Nail Art Palette, swirl them slightly with the Dotting Tool, and then take some gel polish with the Flat Brush to apply it in the Blooming Gel. This helps blend the marble design seamlessly. This brush is also great for trendy tortoise shell patterns and vertical ombre nails.

6. Penseel and Dappendish
This brush resembles the Flat Brush but is narrower and firmer, making it ideal for French Manicures. Use some cleaner in the dappendish to clean the brush, then apply white gel polish to the top half of your nails. Clean the brush with cleaner, dry it on a nail wipe, and perfect the half-moon shape.
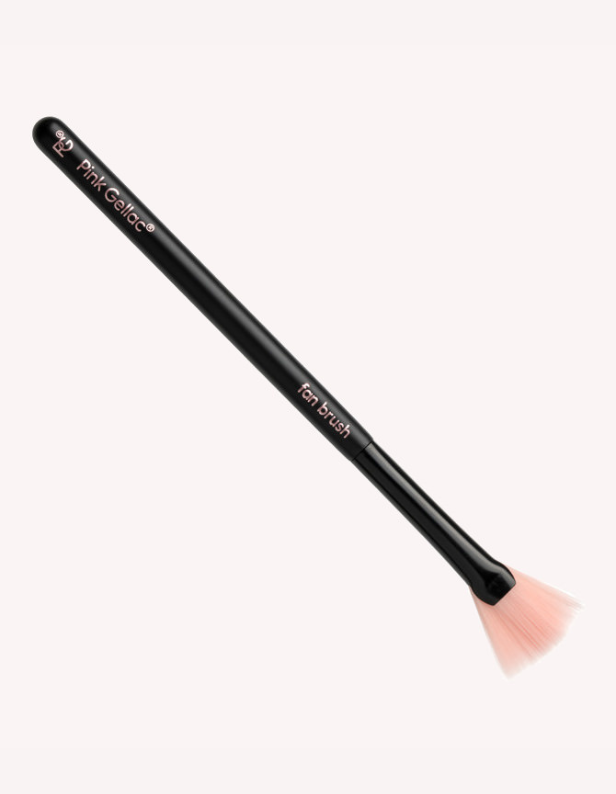
7. Fan Brush
A Fan Brush is actually a very versatile tool in nail art. It is characterised by its flat, wide shape with bristles arranged in a fan-like spread. You can use this medium-length brush for creating a smooth glitter ombre effect, for adding stroked patterns or texture. Additionally, a fan brush is often used for applying loose glitter, removing excess glitter or dusting away access chrome powder or nail dust that came from filing. This brush is very underrated and therefore a must-have to step up your nail art game.
8. Nail Art Stamp
The ultimate tool for applying nail art tattoos, the Nail Art Stamp can also assist in creating a French Manicure. It’s easy to clean with cleaner, and you can use tape to remove any dust from the stamp.
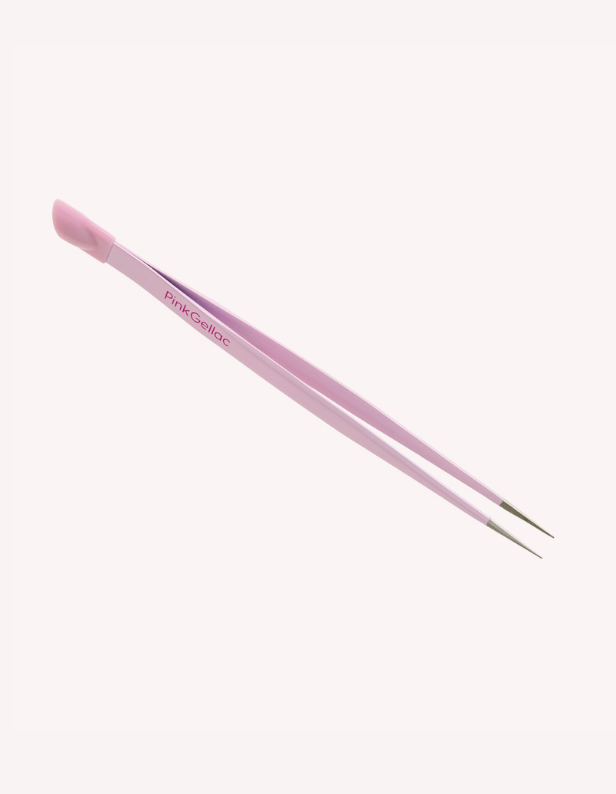
9. Nail Art Tweezer
Use the double-sided Nail Art Tweezer to easily apply stickers and glitters. The silicone tip helps smooth out nail art stickers without the interference of oily fingertips. It’s also perfect for placing rhinestones with precision.
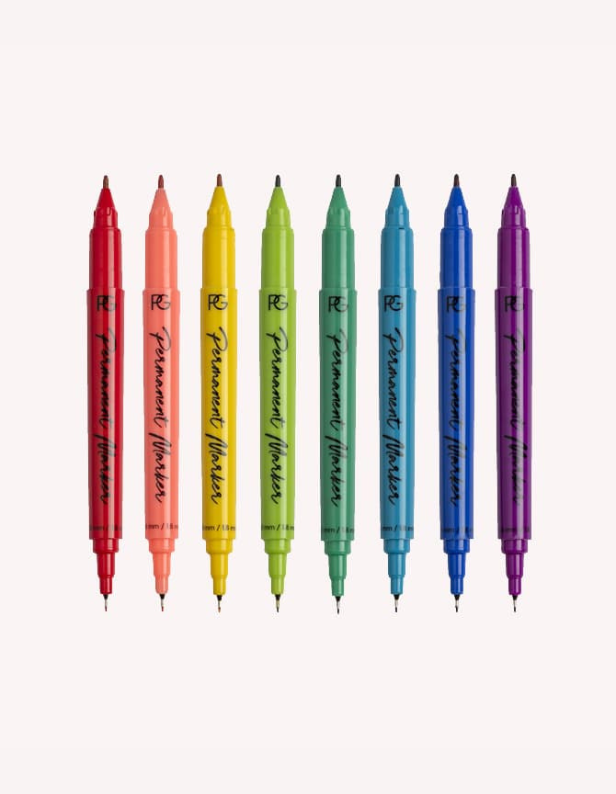
10. Permanent Markers
These markers are specifically designed for nails, featuring a regular tip and an ultra-fine liner tip. This allows for endless designs, from writing and drawing to creating marble or watercolour effects. Apply over a base coat and/or base colour, after having removed the sticky layer with cleaner, to prevent the marker from seeping into the nail and to prevent losing pigment. For marble or watercolour effects, draw random lines and blend with a brush dipped in cleaner. The markers dry by air in about 30 seconds. Seal with a top coat for a lasting design. Discover more in depth how to work with the permanent markers.