How To Do Glitter Ombre Nails

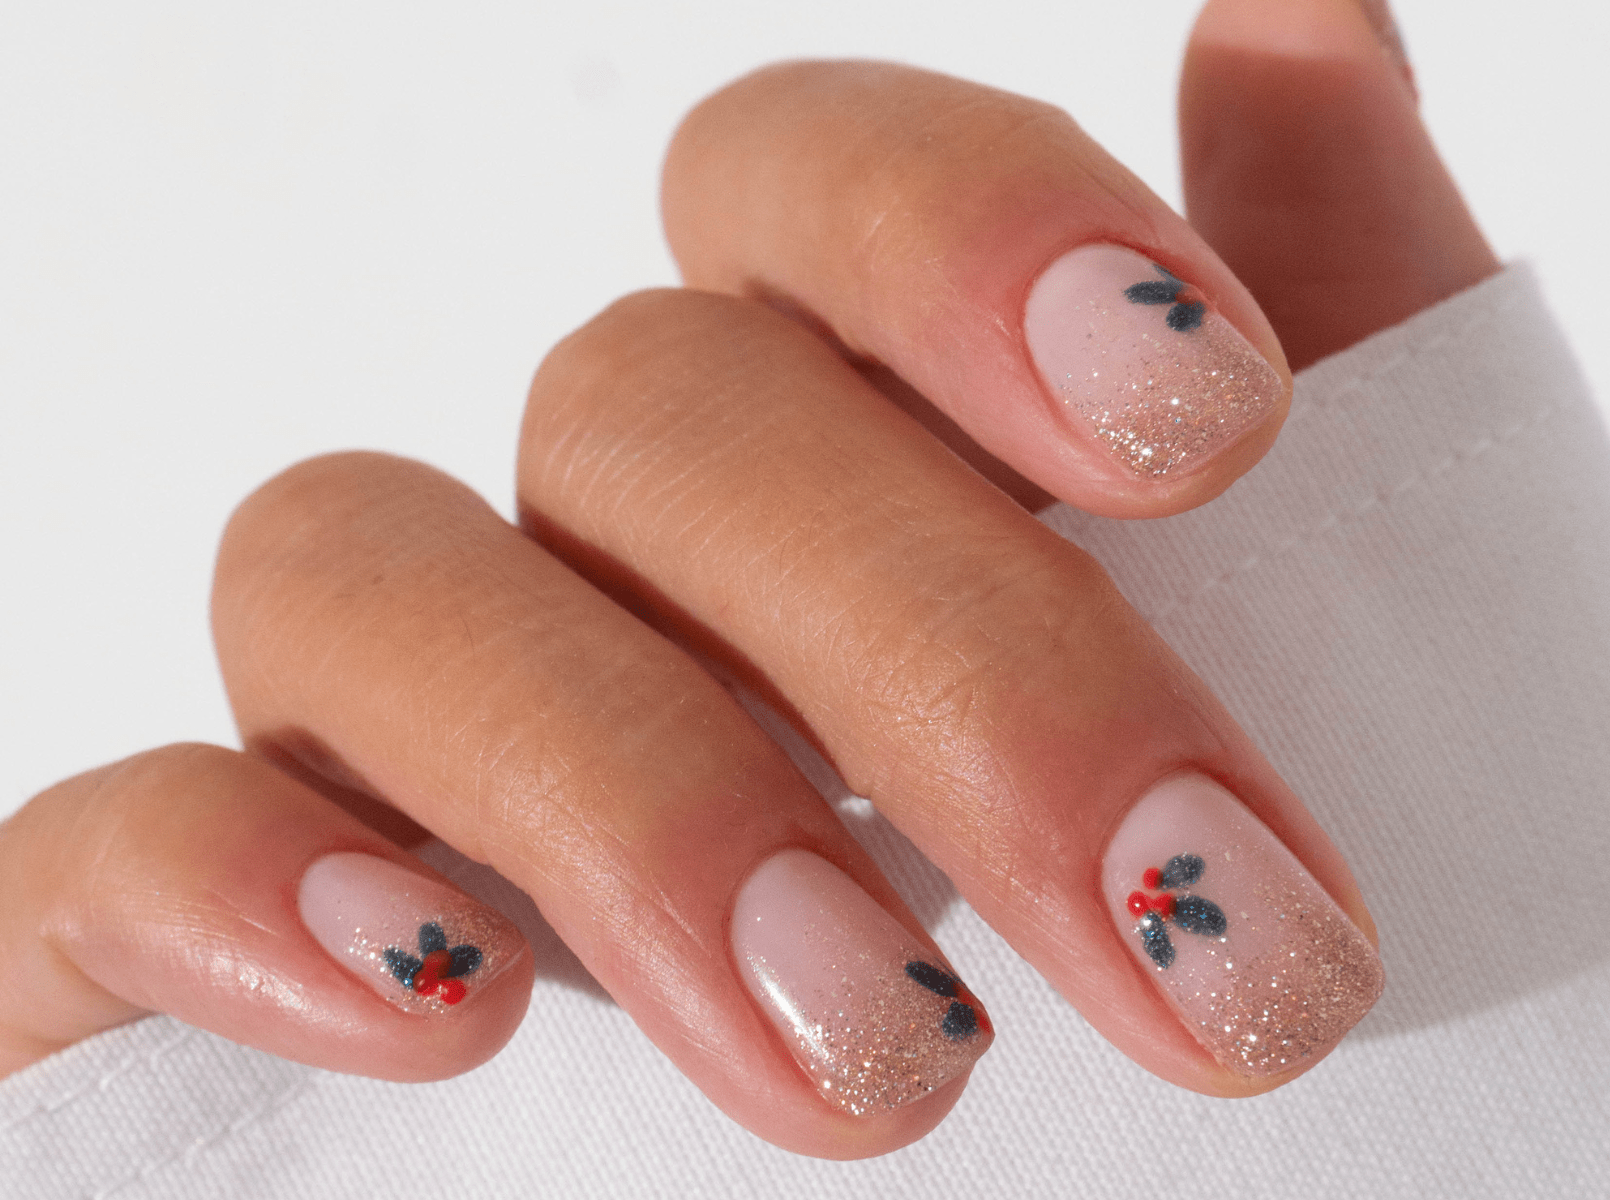
Step into twilight with the Mystical Dusk Collection, the perfect palette behind this stunning nail art look. Featuring luxurious winter and festive shades—including two dazzling reflectives—this collection brings magic to your nails. The combination of glitter ombre with a christmas holly accent is elevated by the deep, bold colours and reflecting highlights of this collection. Let your nails capture the allure of dusk, adding a touch of festive glamour and sophistication to any look.
Start with your usual nail prep routine and apply your favourite base coat.
Step by step

Step 1:
Apply a layer of 419 Marshmallow Nude over the entire nail. Cure for 60 seconds under the LED lamp. If you want more coverage, you can apply a second layer.

Step 2:
Take a bit of 433 Reflective Champagne, focusing on the tip and the center of the nail plate. Gently brush the glitter downwards to create a soft ombre effect, allowing the sparkle to gradually fade as you move towards the cuticle.

Step 3:
Add another layer of 433 Reflective Champagne to the tip of the nail, focusing on building up the sparkle for a more pronounced effect.

Step 4:
Now, take a Fine Liner brush and gently spread the glitter towards the cuticle. Use light, sweeping motions to evenly distribute the sparkle without adding too much density outside the tip area. If you are satisfied, cure it for 60 seconds.

Step 5:
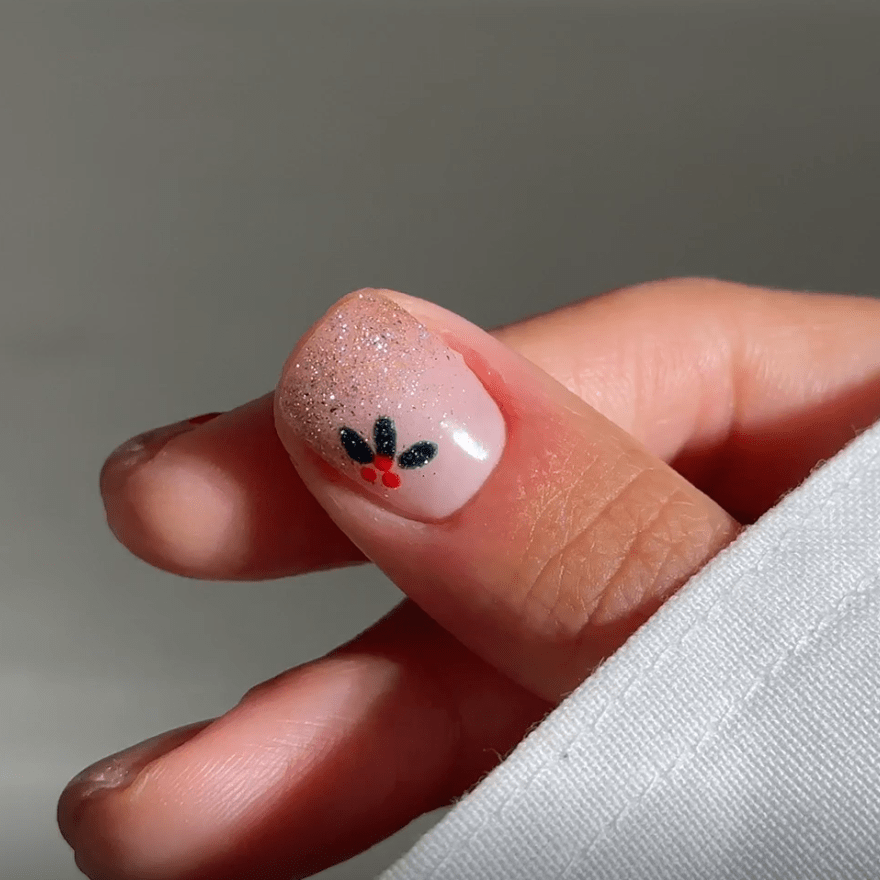
Using a Detail Brush, create the leaves of the Christmas holly by painting three small leaf shapes close together with the 429 Reflective Emerald. Carefully dab the brush to form rounded edges for each leaf.

Step 6:
Using the 430 Bombshell Red, dip your Dotting Tool into the polish and create the Christmas holly berries. Add three small red dots in the center of the leaves, clustering them closely. If the christmas holly is made, you cure it for 60 seconds.

Step 7:
Apply one of our Top Coats over the entire nail and leave to harden for 60 seconds. Have you used the Shine Top Coat? Then remove the sticky layer with the Cleaner.
Step 8:
It's all done and now you can enjoy your new festive manicure!
Are you going to recreate these Mystical Dusk Glitter Ombre Nails? Share your creation and tag us! Use @pinkgellac or #pinkgellac so we don’t miss out!