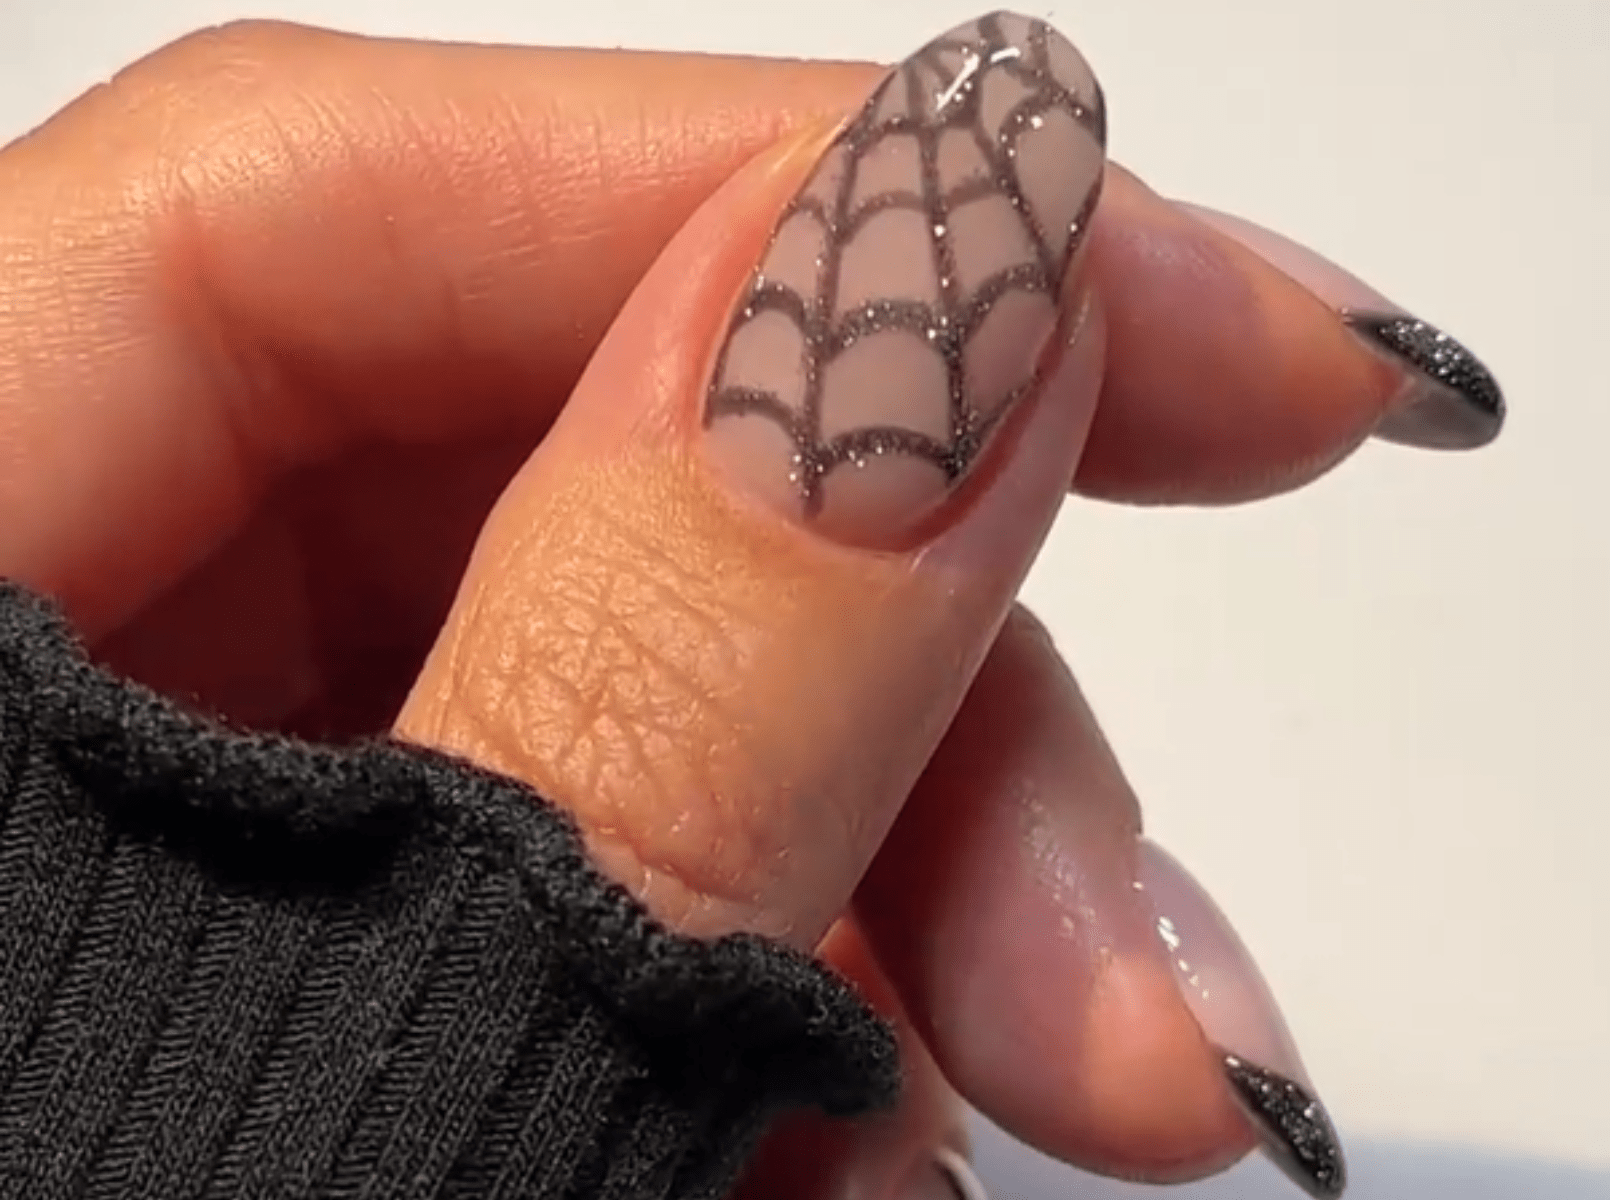
Spider Web Nails

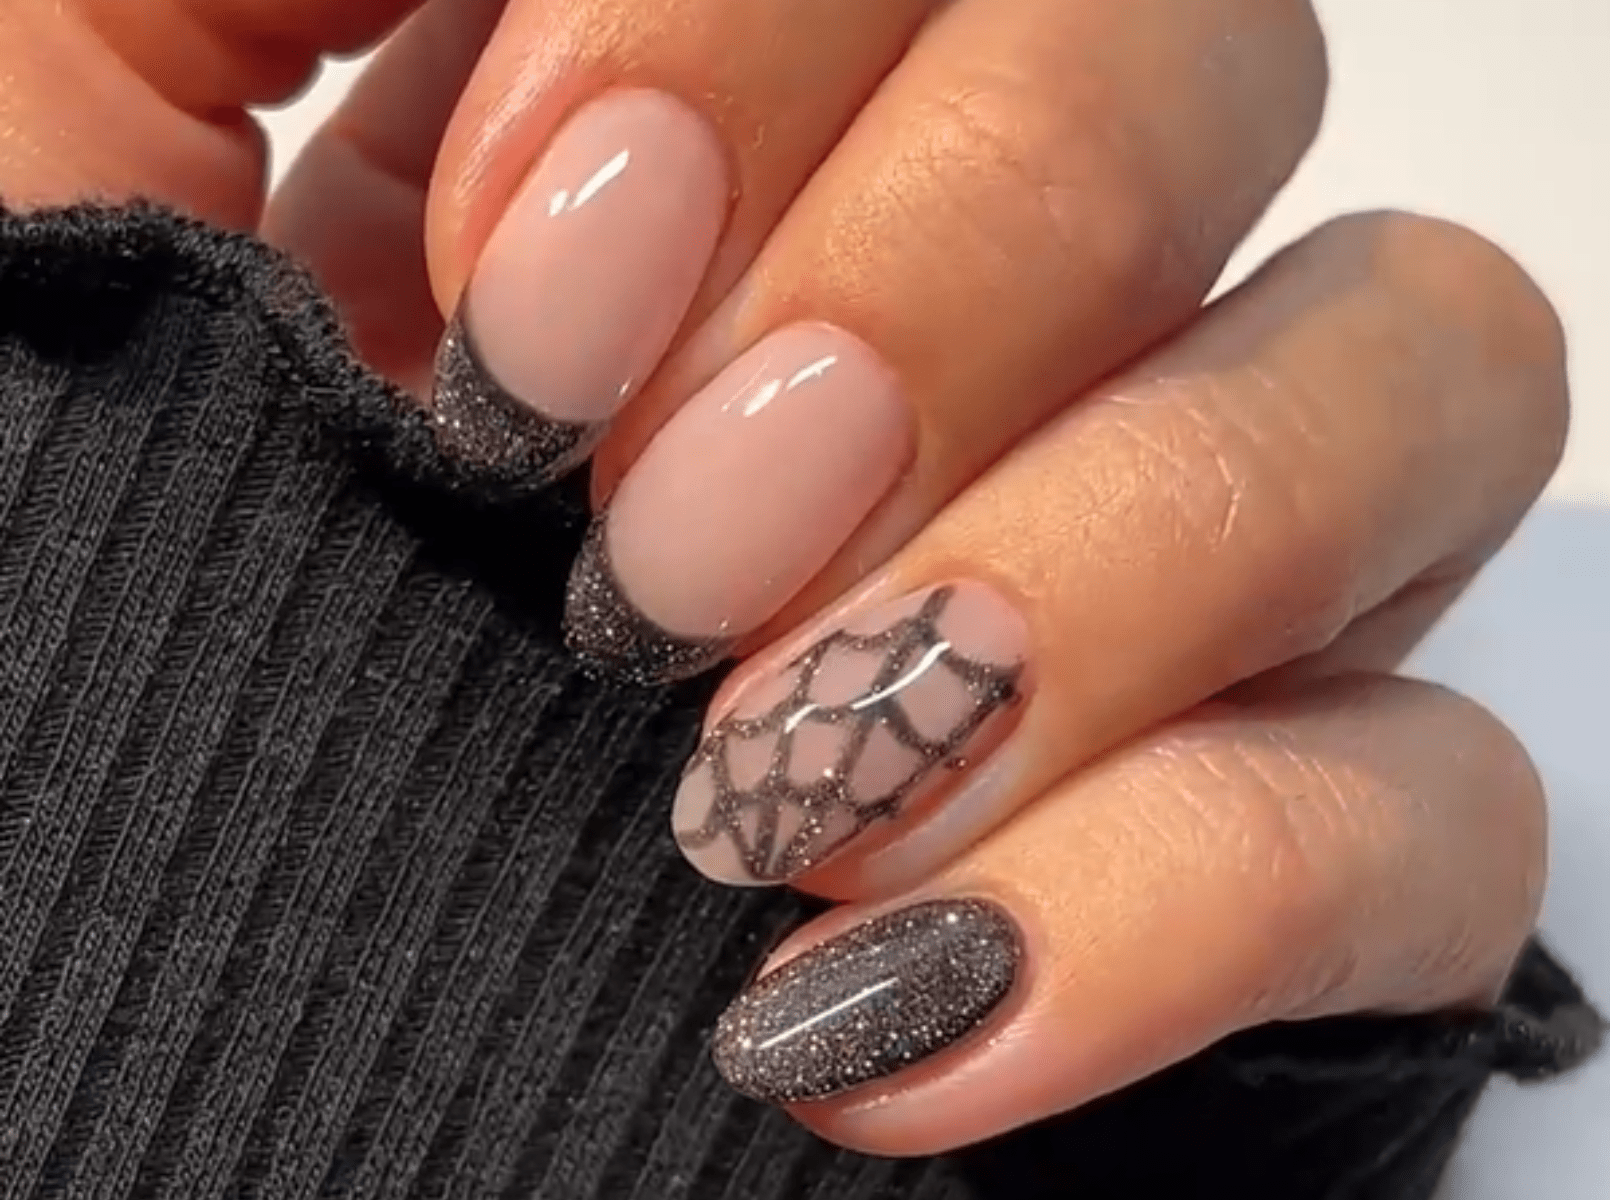
Treat yourself to the perfect blend of style and creativity with our Spider Web Nails tutorial, designed to take your nail art to the next level. Ideal for crafting bold Spider Web Nails using gel polish, this tutorial walks you through the steps to create a striking look featuring sleek black French tips paired with a delicate web accent.
Whether you want a subtle touch of spooky chic or something daring and artistic, this design combines elegance with edge. Ready to create a manicure that’s both bold and beautiful? Let’s get started!
Start with your usual nail prep routine and apply your favourite base coat. Finish this look with a top coat.
Step by step
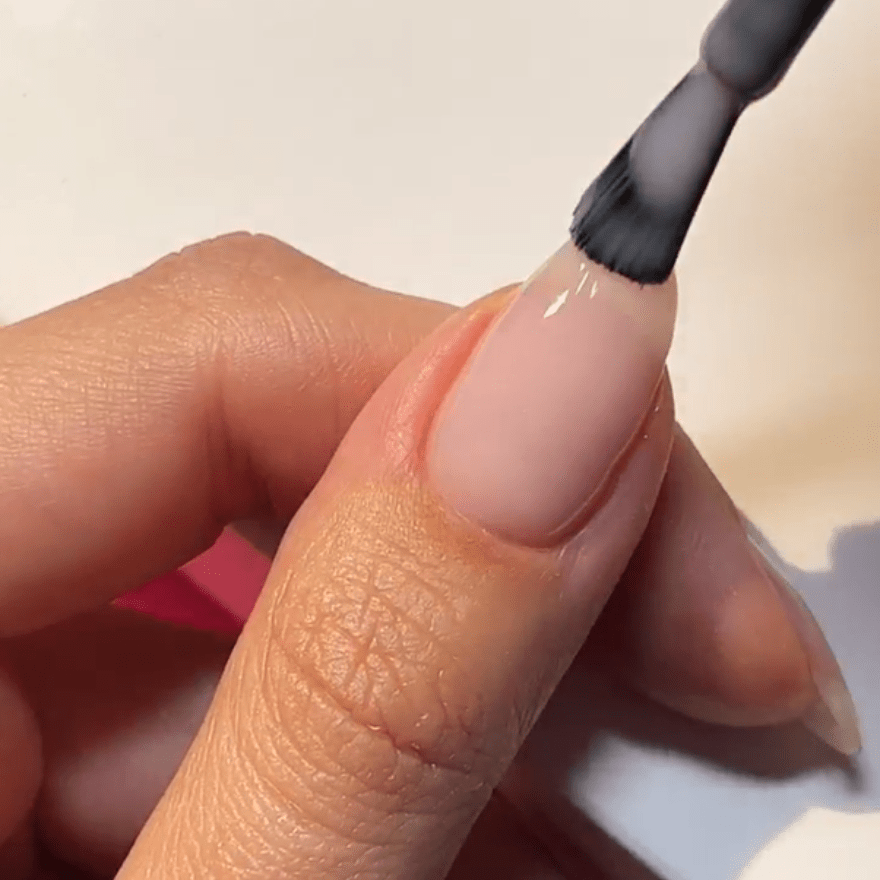
Step 1
Apply a layer of Rubber Base Cover Frosted Pink over the entire nail. Cure for 60 seconds under the LED lamp. If you want more coverage, you can apply a second layer.
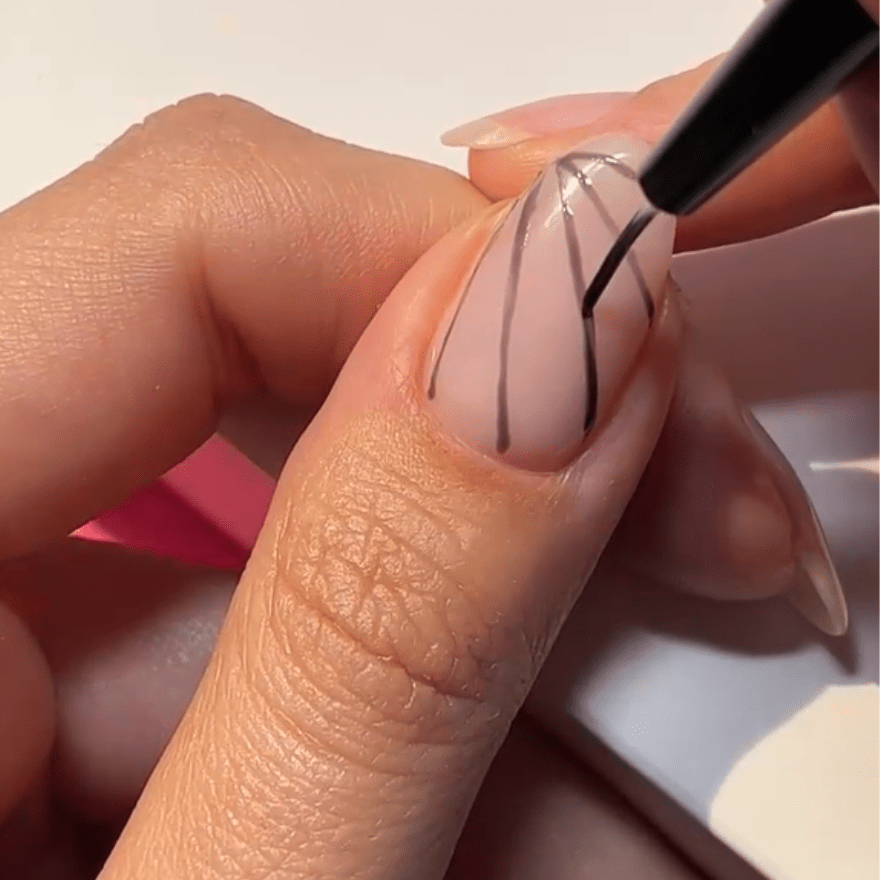
Step 2
Take a bit of 120 Beautiful Black on a Fine Liner and create diagonal lines of the spider web as shown above.
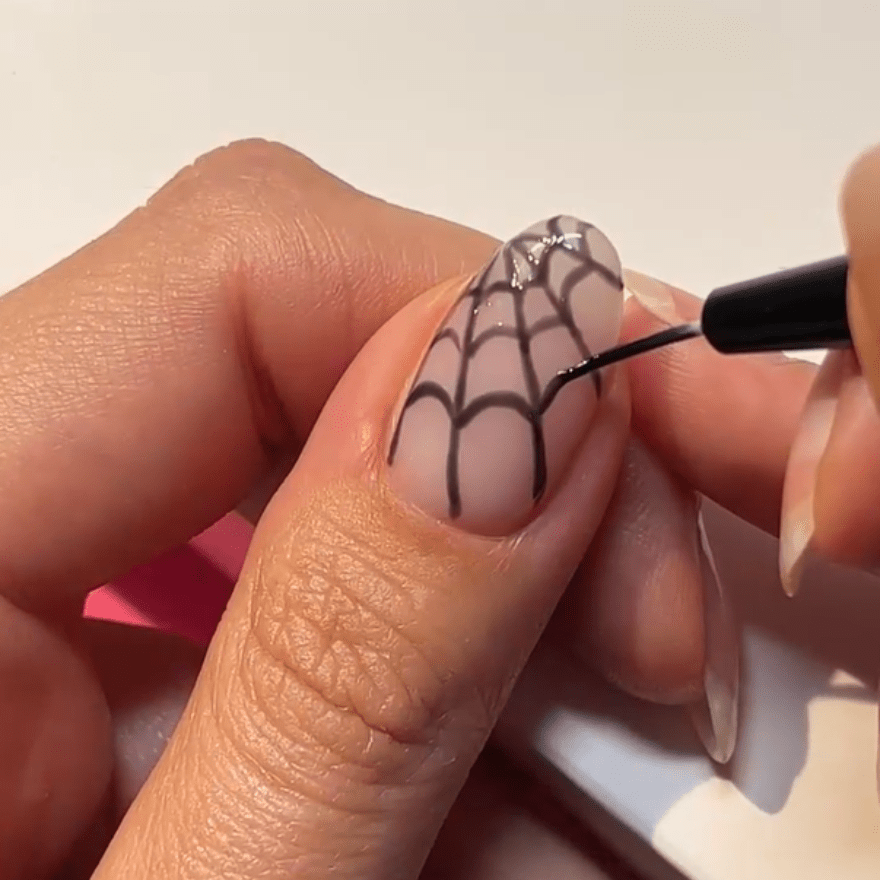
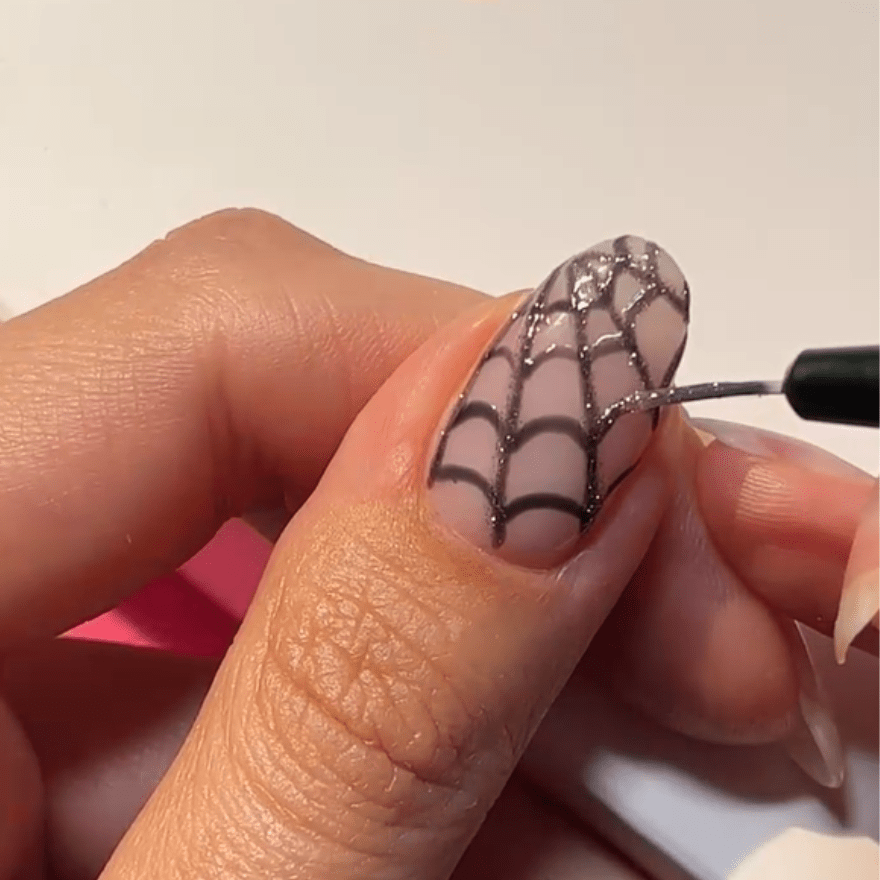
Step 3
Now create the rest of the spider web to complete it, as shown in the photo above. Cure for 60 seconds.
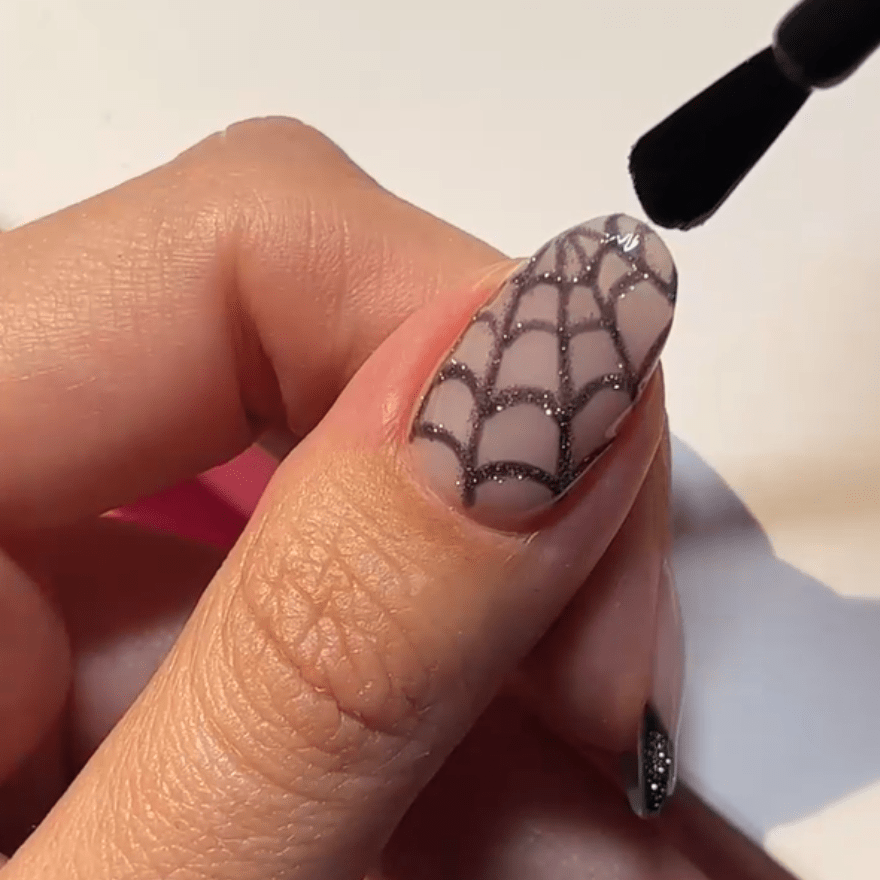
Step 4
For a extra touch you can trace the black lines with 359 Reflective Lilac. This also needs to be cured for 60 seconds.
Tip:
A great alternative for de 359 Reflective Lilac can be the 386 Reflective Black!
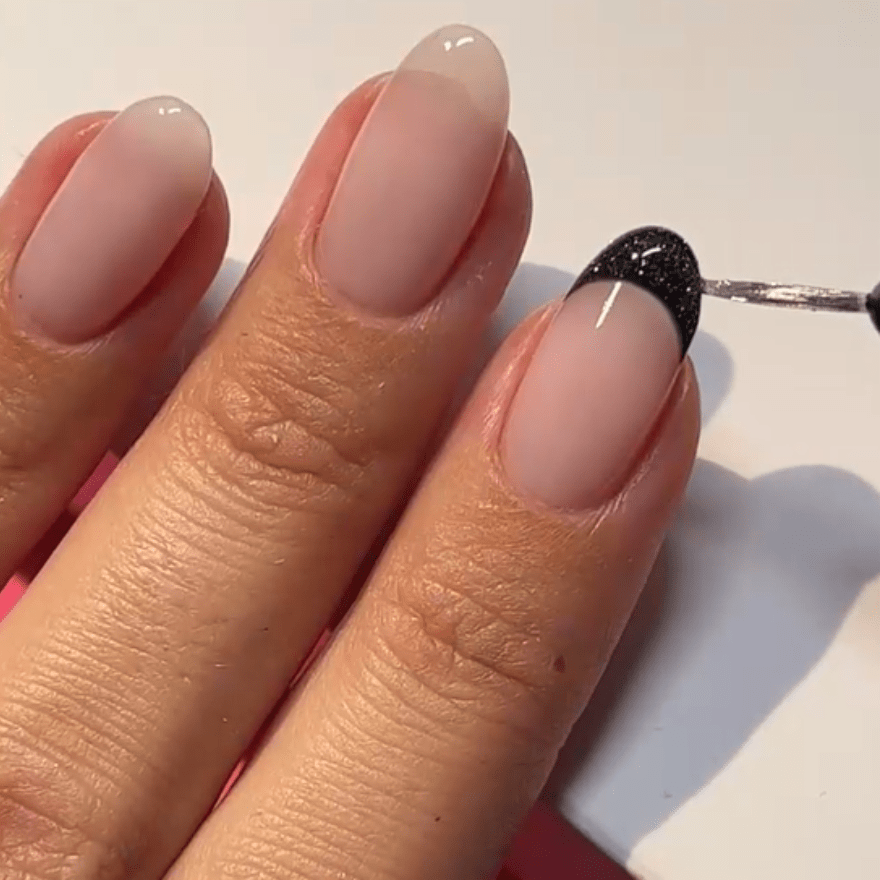
Step 5
Alternate your nails with a French manicure, using the same colours as the spider web.
step 6
Finish this look with your favourite top coat.
Are you going to recreate these Spider Web Nails? Share your creation and tag us! Use @pinkgellac or #pinkgellac so we don’t miss out!