How to do Daisy Nail Art?


PREP YOUR NAILS
Prepare your nails by filing them into the desired shape. Remove the natural shine from your nails with the polishing block. Use the Cleaner to clean and degrease your nails. Apply the Prep Booster and let it air dry for 30 seconds.

STEP 1 – APPLY BASE COAT
Apply the Base and let it cure for 60 seconds under the LED lamp.

Step 1 - Apply a sheer colour
Begin by applying two coats of 388 Rosewater Pink as the base layer on your nails. Cure each layer for 60 seconds under the LED lamp.

Step 2 - Creating the petals
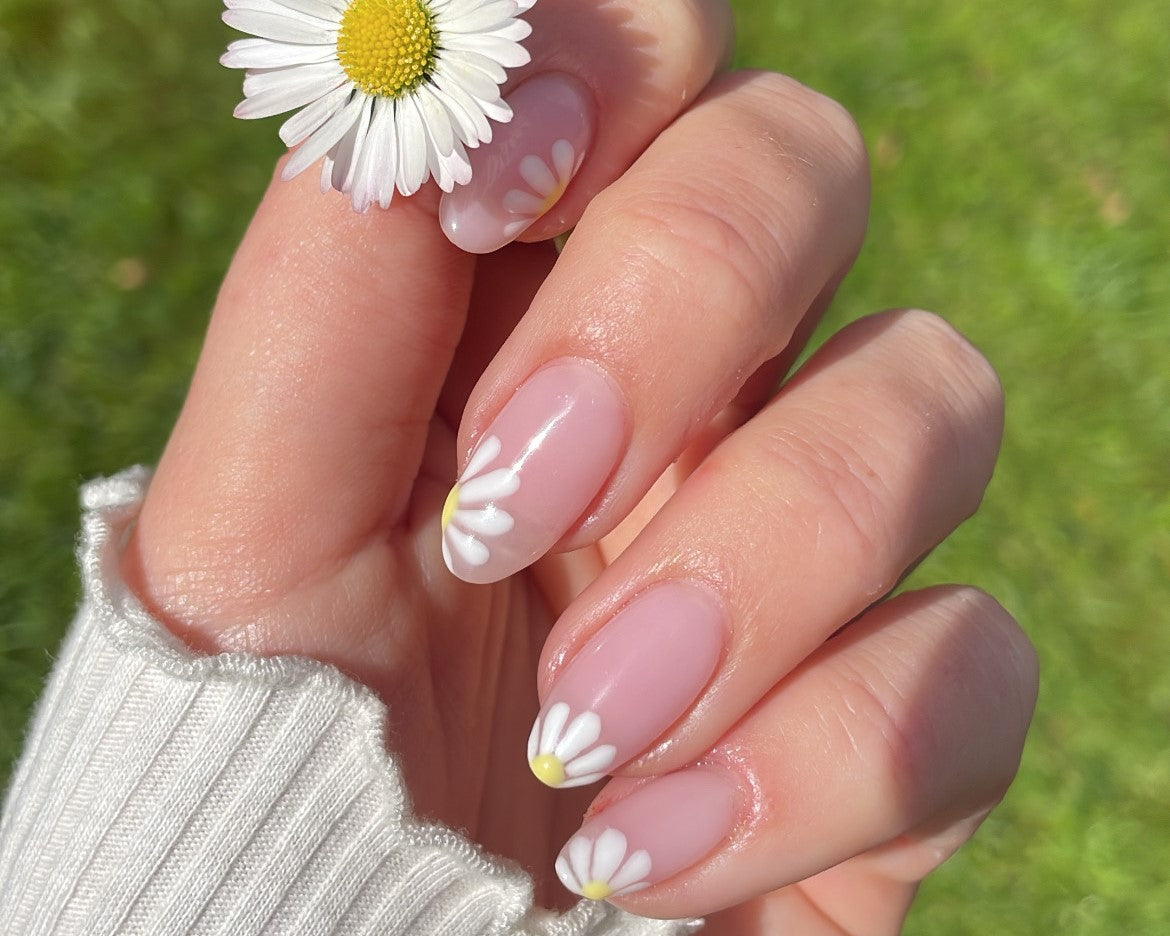
Next, take a small amount of 101 Soft White on your Fine Liner Brush to create the petals of your daisies. Draw the lines radiating from the outside in.

Step 3 - Finish your daisies
Now, take a small amount of 213 Juicy Yellow on your Dotting Tool and apply a small dot in the centre of the flower. Cure this for 60 seconds under the LED lamp.
Repeat this step on all nails and.

Step 4 - Top Coat
Finally, let your nails shine with the Shine Top Coat and let it cure for 60 seconds under the LED lamp. After this, take off the sticky residue with a Nail Wipe with Cleaner. This step not only provides a brilliant gloss but also protects your Daisy Nail Art from chipping, allowing you to enjoy your creation for longer.
And that’s it! Don’t forget to share your beautiful creations with us on social media and stay tuned for more inspiration, tips, and trends.