How to use the Steam Gel Remover
Removing your gel manicure should feel just as enjoyable as applying it. That is why we are introducing the Steam Gel Remover: an innovative way to remove your gel manicure at home using warm steam and remover.
The Steam Gel Remover is suitable for removing gel manicures created with gel polish, Build it Base, Rubber Base and Gel Nail Stickers.
Using the Steam Gel Remover
Watch the video and follow the steps below to ensure safe and proper use of the Steam Gel Remover.
Step-by-step

Step 1. Prepare your nails
Good preparation really makes a difference. Carefully file the top coat of your manicure with a Nail File. A 180 grit file works best. Do not forget to file the edges as well.
Why is this important? Once the protective top coat has been removed, the warm steam can penetrate the gel polish more effectively. This allows the manicure to come off faster and more evenly.

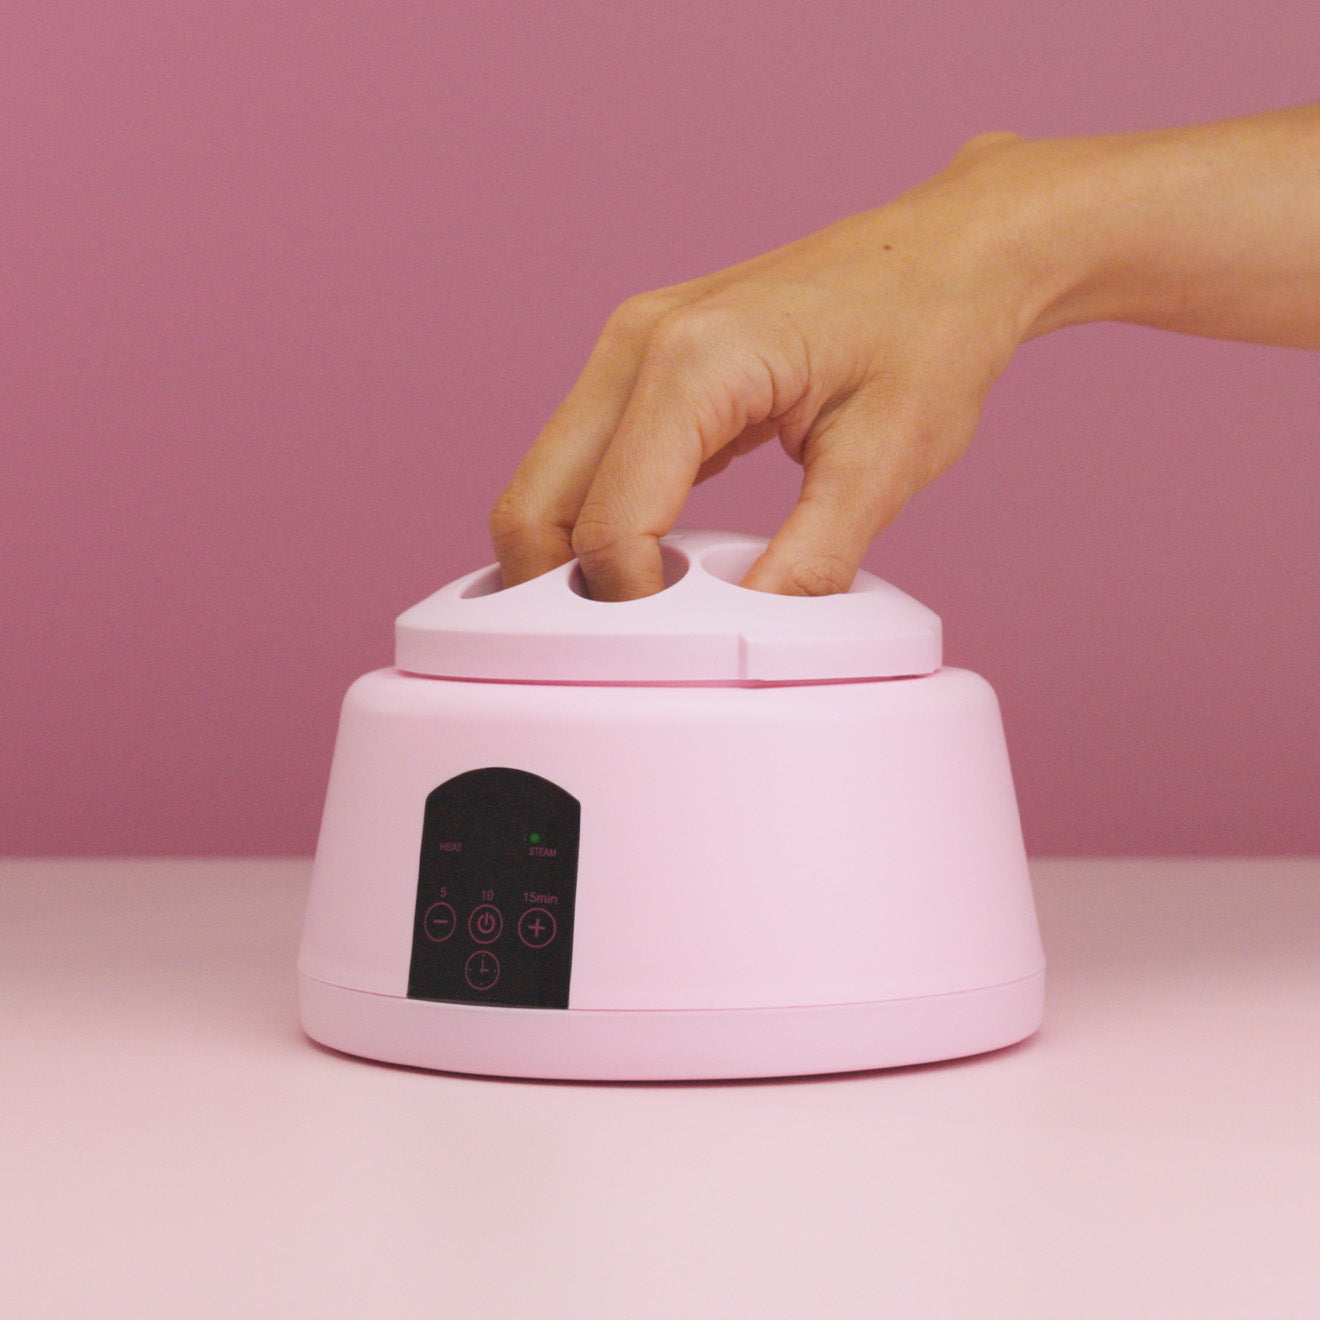
Step 2. Prepare the device
Open the Steam Gel Remover and fill the reservoir with approximately 5–10 ml of remover. Close everything securely and switch on the device using the power button.
Within approximately one minute, the device heats up to the ideal temperature of 53°C. Once the green light appears, the remover has turned into steam and is ready to use.
Tip: During use, you may feel a gentle warmth. This is completely normal. If it feels uncomfortable, remove your hand from the device for a moment. If the discomfort continues after placing your hand back, you can easily lower the temperature using the ‘–’ button on the display.
You can also adjust the steaming time yourself using the ‘clock’ button. Choose between 5, 10 or 15 minutes depending on the type of manicure you are removing. For regular gel polish and Gel Nail Stickers, we recommend 10 minutes. Using Build it Base? Choose 15 minutes for the best result.
Tip: Did you use Primer when applying your manicure? Allow the gel to steam for approximately 10 to 15 minutes so the remover has enough time to loosen the manicure properly.
An added benefit: thanks to the Silicone Finger Guards, the steam is directed straight onto the nails while helping to protect the skin.

Step 3. Let the steam do the work
Carefully place your fingers into the device. Keep your fingers slightly bent inside the device while the warm steam loosens the gel. Make sure your nails and fingers do not touch the remover liquid.
After 10 minutes, you will hear a beep to indicate the session is complete. During use, you may feel a gentle warmth, exactly as intended.
Meanwhile, the steam breaks down the gel structure, allowing it to lift from the natural nail without aggressive scraping.

Step 4. Remove the gel
After the steaming session, use a Cuticle Pusher or Woodstick to gently push the softened gel from the nail. The gel should come off in soft flakes or layers. Is there still some product remaining? No problem. Simply steam your nails for a few more minutes.
Once all the gel has been removed, wipe the nails with a Nail Wipe and Cleaner to remove any remaining residue and leave the nails clean and fresh.
Important: never force gel that is still attached to the nail. Gentle removal helps keep your natural nails healthy.

Step 5. Aftercare
Clean your nails with a Nail Wipe, wash your hands and apply Cuticle Oil for a nourished finish.
Tip: Would you like to apply a new gel manicure? Wait at least one hour before starting. During steaming, the nails temporarily absorb moisture, which may slightly expand the nail plate.
Giving your nails time to rest allows them to return to their natural shape, helping to ensure optimal adhesion for your next gel manicure.
Clean and store
First switch off the device, unplug it and allow it to cool completely before cleaning.
In most cases, only a small amount of remover liquid remains in the reservoir. This can easily be removed using a Nail Wipe. If more liquid remains, do not pour it down the sink or drain. Dispose of it according to your local waste regulations.
Also wipe around the Silicone Finger Guard to remove any product build-up. Make sure all parts are completely dry before using or storing the device again.
For optimal longevity, always store the Steam Gel Remover empty, upright and closed. This helps keep the device clean and protected from dust.
Tip: Ready for a new Silicone Finger Guard? Extra guards are included in the packaging and can easily be replaced by twisting open the underside of the upper section.


