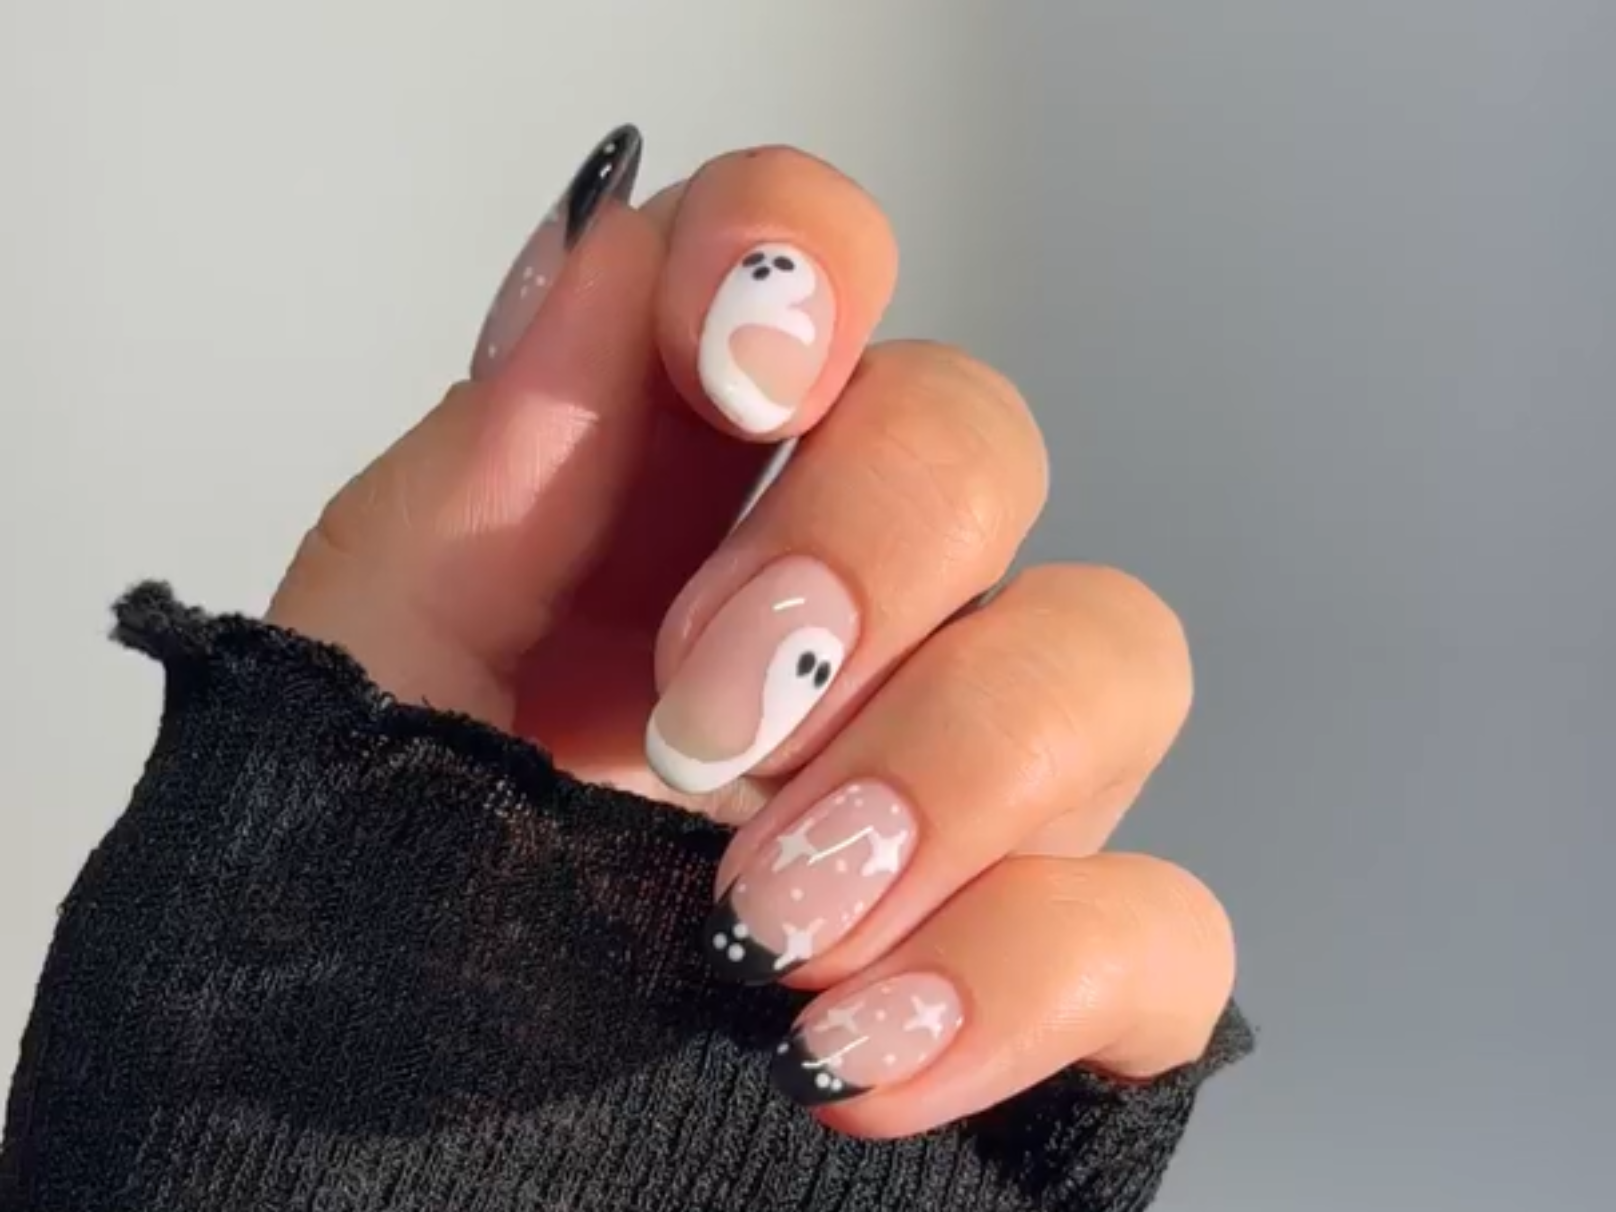
Spooky Nail Art


What Do You Need?
- The basics such as the Prep Booster, polishing block, a LED lamp, a Base Coat and a Top Coat
- Rubber Base Cover Soft Nude
- 299 Coco White
- 120 Beautiful Black
- Detail Brush
- French Manicure Brush
- Dotting tool
Create your Spooky nail art as follows.
Prepare your nails by filing them into shape and removing the natural shine from the nails with the polishing block. Use the Cleaner to degrease and clean the nails. Then apply the Prep Booster and let it air dry for 30 seconds.
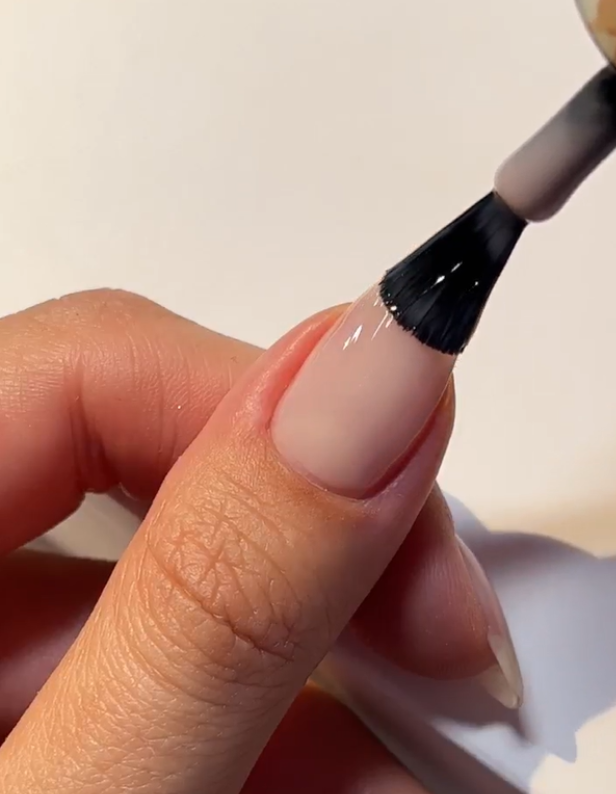
Step 1 - Apply Base Coat
Apply the Rubber Base Cover Soft Nude and let it cure for 60 seconds under the LED lamp.
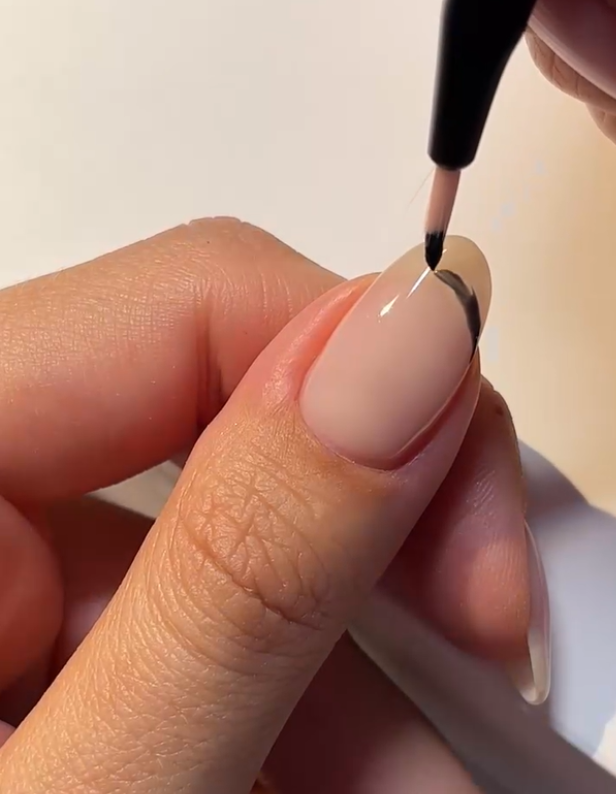
Step 2 - Apply smile line
Take a little of 120 Beautiful Black on the French Manicure Brush and draw a curved line from left to right in one stroke. Fill this in with more black lacquer.
Step 3 - Line cleanup
With the angled side of the French Manicure Brush, you can tighten the line after this by pulling the bristles along the line. Let this cure for 60 seconds under the LED lamp.
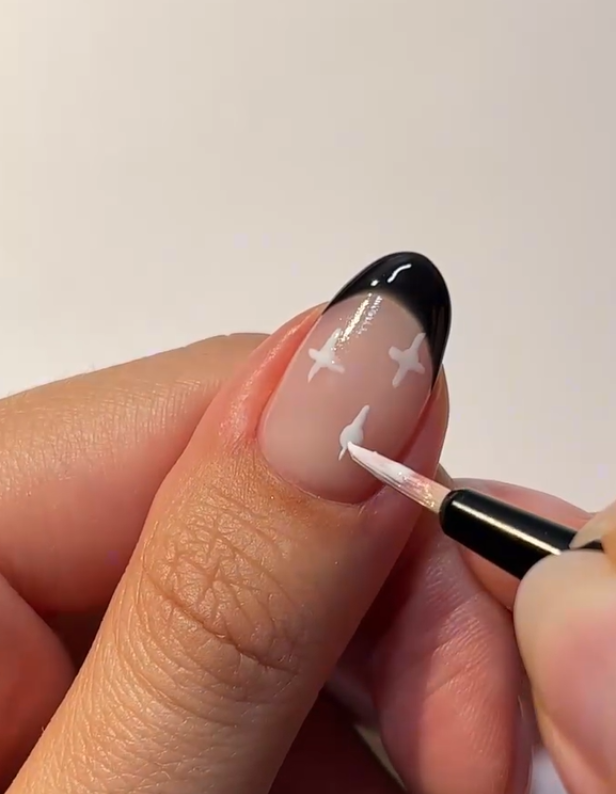
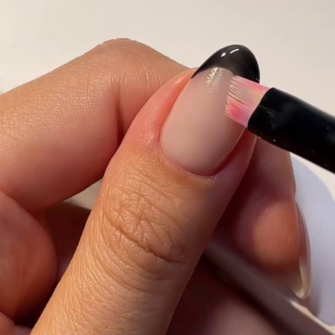
Step 4 - Apply stars
Take a small amount of 299 Coco White on the Detail Brush and put small dots under the black smile line. From these dots, draw thin lines to form small stars. Let this cure for 60 seconds under the LED lamp.

Step 5 - Apply Ghosts
Take a bit of 299 Coco White on your Dotting Tool and apply a larger circle on another nail.
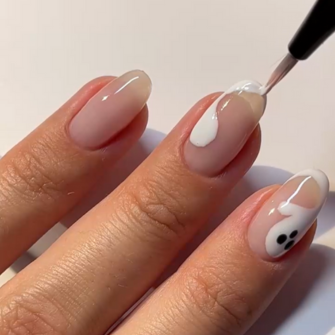
Step 6 - Draw a half circle
From this circle, draw a C shape downwards with the Detail Brush and let this cure for 60 seconds under the LED lamp.
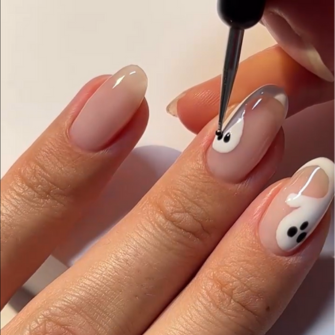
Step 7 - Add eyes
Clean the Dotting Tool and pick up some 120 Beautiful Black on this. Put three small dots, these will form the eyes and mouth. Let this cure for 60 seconds under the LED lamp.
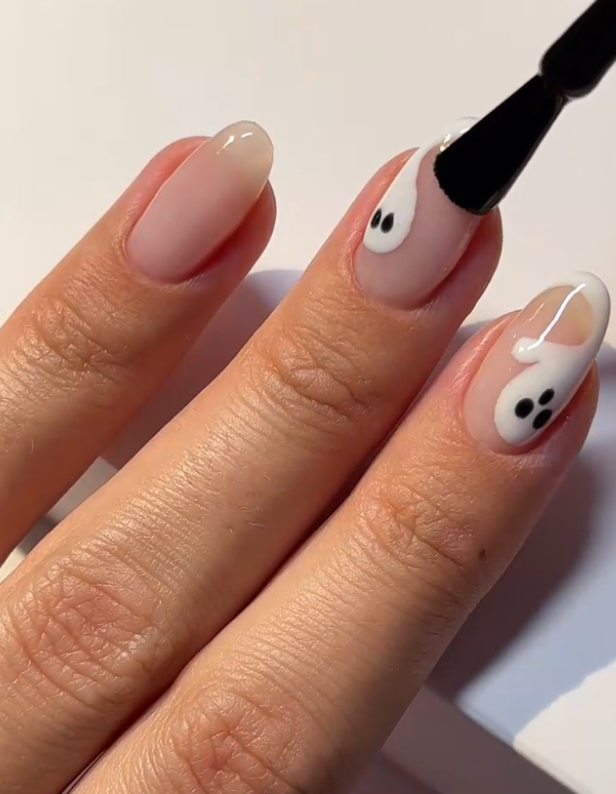
Step 8 - Apply Top Coat
Apply one of our Top Coats to the entire nail and cure for 60 seconds under the LED lamp. Have you used the Shine Top Coat? Then take off the sticky layer with the Cleaner.
Enjoy the spooky season and don't be afraid to show off your nails with these spooky creations. Happy Halloween!
The fun part about this look is that you can give it your own twist. You can use different colors or draw the ghosts in your own way. Put your personal spin on this playful look or recreate it exactly as shown!
Share your creation and tag us! Use @pinkgellac or #pinkgellac so we don’t miss your look!