•February 11, 2025
•1
min read
How to do a French manicure?
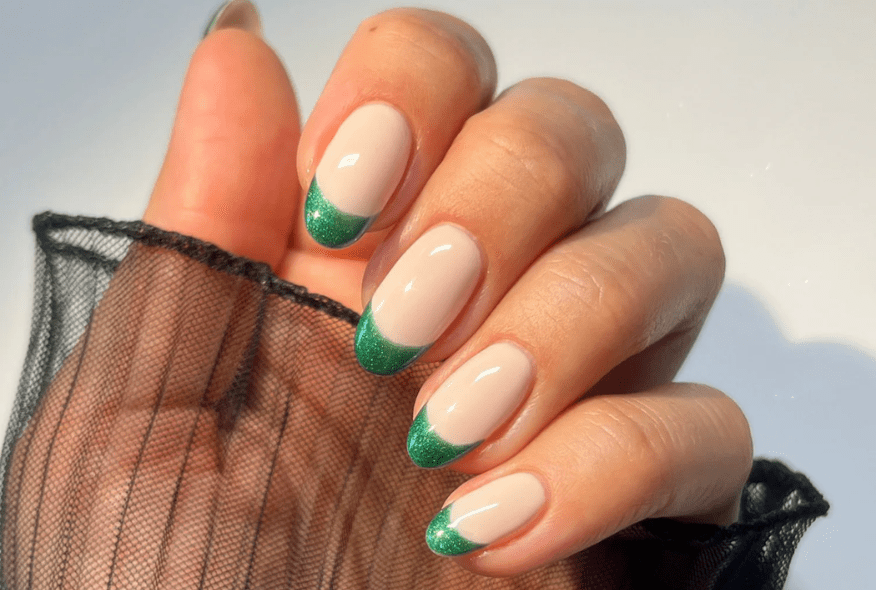
A French Manicure is one of the most popular nail art techniques, but it doesn't have to be the traditional look! Instead of the classic white tip, you can get creative and use any colour you like to make your own unique version. In this how-to, we'll show you step-by-step how to create a green French manicure. Follow along, and let's make your nails stand out!
We always like to say: your preparation is key. Make sure you follow these steps for optimal results.
File your nail plate with a Polishing Block. Also File the nail into the desired shape and wipe it down using the Cleaner on a lint free Nail Wipe to remove dust and last oils. Apply a thin layer of Prep Booster to the full nail and let this air dry for 30 seconds. Next is your favourite Base Coat. Apply a thin and even layer to the nail. Cure the Base Coat for 60 seconds under the LED-lamp.


After your preparation, it's time for the gel polish. Apply 1 or 2 layers of 427 Babydoll Pink and let it cure for 60 seconds under the LED lamp.

For the tip, use 428 Glamorous Green. Use a Fine Liner to draw a thin horizontal line at the top of your nail. This line will define the top curve of the tip.

Now create a half-moon shape from the horizontal line using the Fine Liner.
Made a mistake? Wipe it off with Cleaner and start again.

Fill in the rest of the tip with the gel polish brush. Once the tip is done, let it cure for 60 seconds under the LED lamp.
Tip for short nails: Use the Fine Liner to apply the entire tip, this way you work with more precision.

Apply your favorite Top Coat and let it cure for 60 seconds under the LED lamp.

The fun part about a French tip is that you can give it your own twist! Whether you go for classic white edges or play around with colors, patterns, and glitter – the possibilities are endless. Add a personal touch by experimenting with different shapes, colors, and even small details like swirls or stones. This way, you create a unique look that perfectly matches your style and gives your nails that extra something!
Share your creation and tag us! Use @pinkgellac or #pinkgellac so we don't miss your look!